


Quick answer
What this guide helps you do
Fix Jellyfin when newly added movies or episodes do not appear. Check new-file permissions, mounts, Docker paths, scans, monitoring, naming and logs.
Jellyfin beginner path
New to Jellyfin? Follow this order.
These guides form the SmallGrid Jellyfin path: install it, fix folder access, solve empty libraries, reduce unnecessary transcoding, then choose the right mini PC.
Quick answer
When Jellyfin shows older media but does not scan newly added files, check these eight causes:
- the new files were not copied into the final library
- the new files have different ownership or permissions
- Jellyfin cannot traverse the new folder
- the media drive or share is not mounted correctly
- the Docker container cannot see the new path
- the library folder is wrong or case does not match
- automatic monitoring did not detect the change
- naming, file type or logs reveal a scan problem
The most useful first test on a native Ubuntu installation is:
sudo -u jellyfin find "/mnt/media/tv/New Show" -maxdepth 3 -type f | head -20For Docker:
docker exec jellyfin find "/media/tv/New Show" -maxdepth 3 -type f | head -20If the command returns Permission denied, fix access before rescanning. If it lists the files, check the Jellyfin library path, manual scan, monitoring, naming and logs.
Use Jellyfin library not showing files when the entire library is empty. Use the Jellyfin troubleshooting hub for the wider diagnostic flow.
Why old files appear but new files do not
This pattern normally means Jellyfin can access the original library, but the newly created media differs in one important way.
Common file creators include:
- Sonarr
- Radarr
- qBittorrent
- SABnzbd
- NZBGet
- an SMB or NAS account
- another Docker container
- your normal Linux user
New files may arrive with a different:
- owner
- group
- umask
- ACL
- parent directory permission
- host or container path
- filename or extension
Do not recursively rewrite the entire media library until you compare one working item with one missing item.
Fast diagnostic table
| Result | Likely cause | Next action |
|---|---|---|
| New file does not exist in the final media folder | Download or import problem | Check Sonarr, Radarr or downloader history and paths |
Your user sees it but Jellyfin receives Permission denied | Ownership, group, traversal or ACL problem | Compare working and new paths, then fix inheritance |
| Host sees it but Docker does not | Incorrect bind mount or container path | Inspect active mounts and recreate the service if needed |
| Jellyfin can list it but the library does not update | Scan, monitoring, naming or library-type problem | Run a manual scan and inspect logs |
| All media disappears after reboot | Storage mount failure | Repair /etc/fstab, network mount or startup order |
| Manual scan works but automatic detection does not | Filesystem monitoring limitation | Review monitoring and use a scheduled scan fallback |
Fix 1: Confirm the new media exists in the final library
Check recent files:
find /mnt/media -type f -mtime -2 | head -30Inspect the expected path:
ls -la "/mnt/media/tv/New Show"If the file is absent, Jellyfin is not the failing layer.
Check whether the automation service:
- downloaded the file successfully
- imported or moved it
- placed it in the correct final root folder
- left it in an incomplete or downloads directory
- rejected it because of naming, quality or free-space rules
For Sonarr or Radarr, review the activity queue and history. Confirm that the final path matches the folder Jellyfin scans.
Fix 2: Compare a working item with a missing item
Choose one folder that appears in Jellyfin and one newly added folder that does not.
stat -c '%A %U:%G %n' \
  "/mnt/media/tv/Working Show" \
  "/mnt/media/tv/New Show"
Compare files inside them:
find "/mnt/media/tv/Working Show" -maxdepth 2 -type f -printf '%M %u:%g %p\n' | head
find "/mnt/media/tv/New Show" -maxdepth 2 -type f -printf '%M %u:%g %p\n' | head
Look for differences in:
- owner and group
- read permission on files
- execute permission on directories
- inherited ACL entries
- group write settings
- service umask
A directory requires execute permission for Jellyfin to enter it.
Fix 3: Test the path as Jellyfin
Native Ubuntu installation
Run:
sudo -u jellyfin ls -la "/mnt/media/tv/New Show"
sudo -u jellyfin find "/mnt/media/tv/New Show" -maxdepth 3 -type f | head -20
For one file:
sudo -u jellyfin stat \
  "/mnt/media/tv/New Show/Season 01/New Show - S01E01.mkv"
If it fails, inspect the full path:
namei -l "/mnt/media/tv/New Show/Season 01/New Show - S01E01.mkv"This identifies the first parent directory blocking traversal.
Docker installation
Run the equivalent test inside the active container:
docker exec jellyfin ls -la "/media/tv/New Show"
docker exec jellyfin find "/media/tv/New Show" -maxdepth 3 -type f | head -20
If the host sees the folder but the container does not, continue to the Docker mapping check.
Fix 4: Make future files inherit access
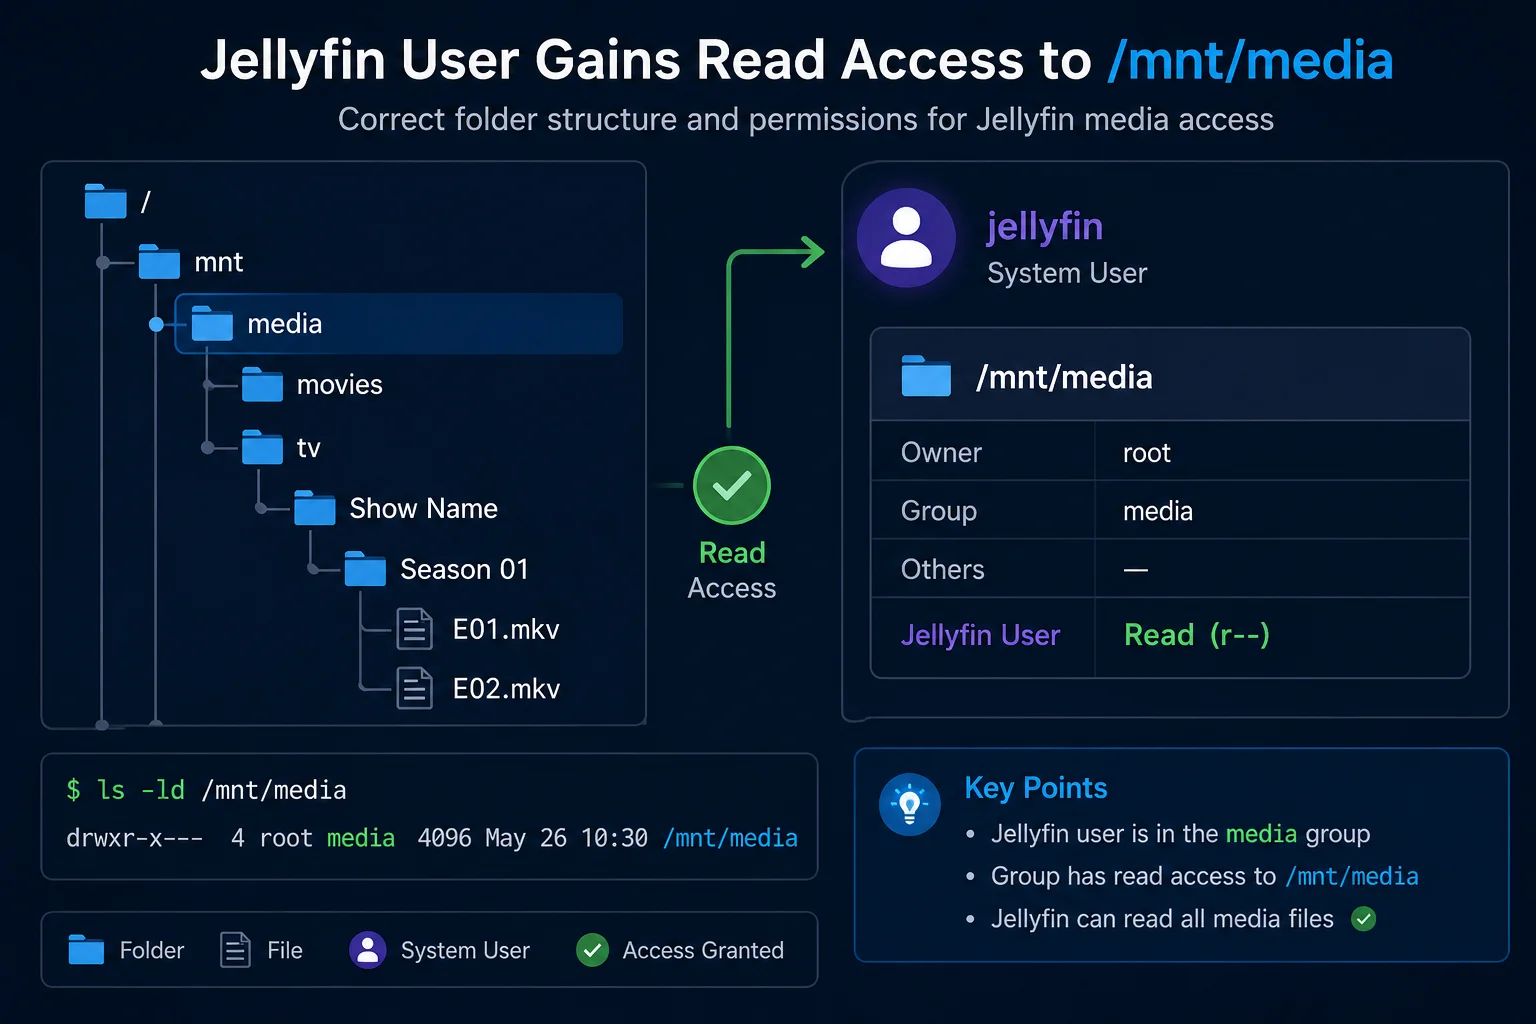
For a native Ubuntu installation on a Linux filesystem that supports ACLs, default ACLs can ensure new media inherits Jellyfin access.
Install the tools:
sudo apt update
sudo apt install -y acl
Give Jellyfin read and traversal access to the existing tree:
sudo setfacl -R -m u:jellyfin:rx /mnt/mediaSet a default ACL for future files and folders:
sudo setfacl -R -d -m u:jellyfin:rx /mnt/mediaVerify:
getfacl -p /mnt/media
getfacl -p "/mnt/media/tv/New Show"
Look for:
user:jellyfin:r-x
default:user:jellyfin:r-x
Restart and scan:
sudo systemctl restart jellyfinDo not use chmod -R 777 as a permanent solution.
For a shared automation stack, a common media group, consistent group ownership, cooperative umask and default ACLs are usually easier to maintain than repeated manual fixes.
Read Jellyfin Ubuntu folder permissions for the full permissions workflow.
Fix 5: Check the service creating the files
Identify the service user:
systemctl status sonarr --no-pager
systemctl status radarr --no-pager
systemctl status qbittorrent-nox --no-pager
Inspect running processes if necessary:
ps aux | grep -E 'sonarr|radarr|qbittorrent|sabnzbd|nzbget'Inspect a new file:
stat "/mnt/media/tv/New Show/Season 01/New Show - S01E01.mkv"If every new import arrives under an incompatible user or group, fix the creating service rather than repeatedly repairing Jellyfin afterward.
For Docker-based automation, compare the PUID and PGID values used by Jellyfin, Sonarr, Radarr and the downloader. Confirm that the shared media paths are mounted consistently.
Fix 6: Confirm the storage is mounted
If media appears inconsistent after reboot, check:
findmnt /mnt/media
lsblk -f
ls -la /mnt/media
A dangerous sequence is:
- the media drive fails to mount
- the empty mount-point directory remains
- a downloader writes new files into that empty local directory
- the actual drive later mounts over it
- the new files seem to disappear
Use UUID-based /etc/fstab entries for permanently attached storage and validate them with:
sudo mount -a
findmnt /mnt/media
For network storage, verify the SMB or NFS mount is available before Jellyfin and the automation services start.
Use Jellyfin media disappears after reboot when this problem follows a restart.
Fix 7: Check Docker volume paths
Example mapping:
services:
  jellyfin:
    volumes:
      - /srv/media/tv:/media/tv:ro
The host and container paths are different:
Host:      /srv/media/tv
Container: /media/tv
Inspect the active mapping:
docker inspect jellyfin \
  --format '{{range .Mounts}}{{println .Source "->" .Destination "|" .Mode}}{{end}}'
Test the new media from inside the container:
docker exec jellyfin find /media/tv -type f -mtime -2 | head -30If the expected mount is missing, check and apply the correct Compose configuration:
docker compose config
docker compose up -d
Inside Jellyfin, use /media/tv, not /srv/media/tv.
Read Jellyfin Docker volume paths explained and Jellyfin Docker permissions for detailed fixes.
Fix 8: Run a manual scan, then inspect monitoring and logs
Open Jellyfin and run:
Dashboard → Libraries → Scan All LibrariesA manual scan separates a general scan failure from an automatic monitoring problem.
If the manual scan works
Automatic monitoring may not be receiving filesystem notifications reliably.
This is more common with:
- SMB and NFS mounts
- some Docker bind mounts
- pooled or unusual filesystems
- files moved across filesystems
- watcher limits
Review the library’s real-time monitoring setting. A scheduled library scan is a practical fallback when filesystem notifications are unreliable.
If the manual scan does not work
Check the exact library path and Linux case:
/mnt/media/tv
/mnt/Media/TV
These are different paths.
Then inspect logs.
Native installation:
sudo journalctl -u jellyfin --since "15 minutes ago" --no-pagerDocker:
docker logs --since 15m jellyfinFilter likely messages:
sudo journalctl -u jellyfin --since "15 minutes ago" --no-pager |
  grep -Ei 'permission|denied|scan|watch|inotify|not found|inaccessible'
Look for:
Permission denied- path not found
- inaccessible directory
- filesystem watcher errors
- unsupported media
- scan failures
Run a scan immediately before collecting the logs.
Check naming and folder structure
Recommended television layout:
/mnt/media/tv/Show Name/Season 01/Show Name - S01E01.mkvRecommended movie layout:
/mnt/media/movies/Film Name (2026)/Film Name (2026).mkvInspect the new files:
find "/mnt/media/tv/New Show" -maxdepth 3 -type fCheck for:
- partial downloads
- temporary extensions
- unextracted archives
- files without recognised media extensions
- samples or extras in unexpected folders
- television content in a movie library
- incorrectly formed season or episode numbers
Poor naming normally causes identification problems rather than Permission denied, so prove filesystem access first.
Exact troubleshooting sequence
Native Ubuntu
find /mnt/media -type f -mtime -2 | head -30
findmnt /mnt/media
stat -c '%A %U:%G %n' "/mnt/media/tv/Working Show" "/mnt/media/tv/New Show"
namei -l "/mnt/media/tv/New Show"
sudo -u jellyfin find "/mnt/media/tv/New Show" -maxdepth 3 -type f | head -20
getfacl -p "/mnt/media/tv/New Show"
sudo systemctl restart jellyfin
sudo journalctl -u jellyfin --since "15 minutes ago" --no-pager
Docker
find /srv/media/tv -type f -mtime -2 | head -30
findmnt -T /srv/media/tv
docker inspect jellyfin \
  --format '{{range .Mounts}}{{println .Source "->" .Destination}}{{end}}'
docker exec jellyfin find /media/tv -type f -mtime -2 | head -30
docker restart jellyfin
docker logs --since 15m jellyfin
Stop at the first failed command. Repair that layer, repeat the same test and only then continue.
Common mistakes
Running scans before proving access
A scan cannot detect files Jellyfin cannot read.
Fixing only the existing files
Without default ACLs, a shared group or corrected service settings, the next import may fail again.
Changing the whole library recursively
Compare one working and one missing item first.
Assuming Docker uses the host path
Jellyfin uses the destination mounted inside the container.
Relying only on real-time monitoring
Run a manual scan during diagnosis. Use scheduled scans when filesystem notifications are unreliable.
Related guides
- Jellyfin 12.2 Update Guide: Fix Scanning, Crashes and Docker Problems
- Jellyfin troubleshooting hub
- Jellyfin on Ubuntu
- Jellyfin library not showing files
- Jellyfin Ubuntu folder permissions
- Jellyfin Docker volume paths explained
- Jellyfin Docker permissions
- Jellyfin media disappears after reboot
Recap
When old media appears but new files do not, compare the new path with a working one and test it as Jellyfin.
sudo -u jellyfin find "/mnt/media/tv/New Show" -maxdepth 3 -type f | head -20If access fails, repair ownership, group access, traversal or ACL inheritance. If access succeeds, verify the mount, Docker path, Jellyfin library folder, manual scan, monitoring, naming and logs.
Jellyfin guide cluster
More Jellyfin fixes and setup guides
These guides link the main Jellyfin setup, permissions, remote access, direct play, and hardware topics together.
Jellyfin 12 Upgrade Guide: 10 Things to Check Before You Update
Prepare Jellyfin 10.10 or 10.11 for version 12: verify backups, plugins, Docker or Ubuntu packages, migrations, permissions, playback and rollback.
How to Reduce Jellyfin Server Power Use on Ubuntu
Reduce Jellyfin server electricity use on Ubuntu by measuring idle and playback power, avoiding unnecessary transcoding, checking background load, storage, CPU behaviour and reboot health.
Give Jellyfin Access to Media Folders on Ubuntu
Fix Jellyfin permission denied errors on Ubuntu. Test the service user, find blocked parent folders, apply safe ACLs, verify inheritance, and check mounted-drive options.
Jellyfin Library Not Showing Files? 8 Checks That Fix It
Fix a Jellyfin library that is empty or missing media. Check mounts, Linux permissions, Docker paths, library folders, naming, scans and logs in the correct order.
Jellyfin Docker Permissions: Fix Media Folder Access and UID/GID Errors
Fix Jellyfin Docker permission denied errors. Check bind mounts, container paths, UID and GID values, read-only media access, active mounts, and file visibility step by step.
Jellyfin Direct Play vs Transcoding: What Is the Difference?
Why is Jellyfin transcoding instead of Direct Playing? Compare Direct Play, Direct Stream and transcoding, CPU usage, quality and common triggers.