


Quick answer
What this guide helps you do
Use snapshots, test VMs, and simple clones so you can tinker without breaking your working homelab.
Goal
Be able to:
- try new things
- upgrade services
- change configs
- test risky ideas
without the constant fear of breaking the working setup.
The rule is simple: experiments are good, but experiments need a safety net.
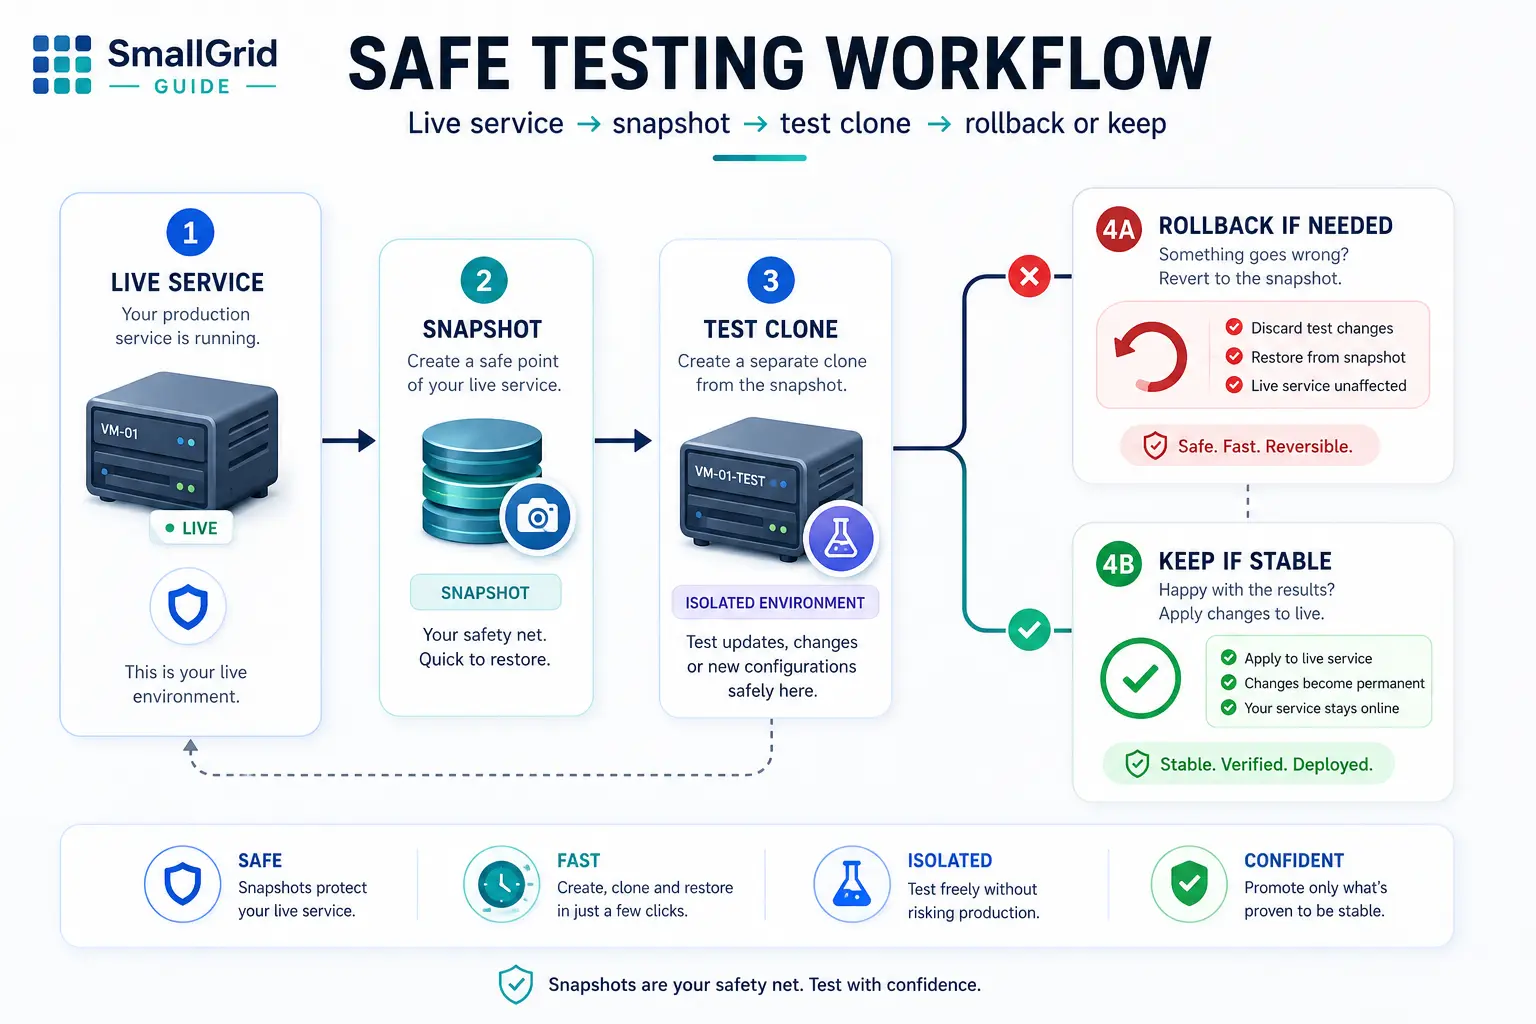
The core idea: disposable copies
Before changing something important, create something you can safely break.
That might be:
- a Proxmox snapshot
- a cloned VM
- a cloned LXC container
- a separate Docker test stack
- a backup copy of a config file
Your live services should be easy to revert or easy to recreate.
Snapshots are useful. They are not a replacement for backups.
For the difference, see Proxmox Snapshots vs Backups: What Beginners Get Wrong.
Proxmox snapshots before upgrades
For VMs and containers running important services, take a snapshot before upgrades or risky config changes.
In the Proxmox web interface:
- Select the VM or container.
- Go to Snapshots.
- Click Take Snapshot.
- Use a clear name, such as
pre-upgrade-2026-06-27. - Make the change.
- If it fails badly, roll back to the snapshot.
CLI example for VM 100:
qm snapshot 100 pre-upgrade-2026-06-27CLI example for container 101:
pct snapshot 101 pre-upgrade-2026-06-27Keep snapshot names boring and obvious. Future you should know exactly why the snapshot exists.
Full clones for bigger experiments
Snapshots are good for quick rollback. Clones are better for bigger experiments.
Use a clone when you want to test something invasive, such as:
- a major application upgrade
- a new reverse proxy setup
- a new database version
- a different storage layout
- a replacement for a working service
In Proxmox:
- Shut down the VM or container if practical.
- Clone it.
- Give the clone a clear name, such as
jellyfin-testorcore-services-test. - Start the clone on a different IP address or isolated network.
- Test the change there first.
The point is not elegance. The point is avoiding an avoidable outage.
Docker: separate stacks for experiments
If you use Docker, keep live services and test services in separate folders.
Example structure:
/srv/docker/
  production/
    jellyfin/
    adguard/
    syncthing/
  test/
    jellyfin-next/
Create a test stack:
mkdir -p /srv/docker/test/jellyfin-next
cd /srv/docker/test/jellyfin-next
cp /srv/docker/production/jellyfin/docker-compose.yml .
Edit the test compose file so it does not clash with the live service.
For example, use port 8097 instead of 8096.
Then start it:
docker compose up -dOpen the test service:
http://YOUR-SERVER-IP:8097Now you can test without touching the live Jellyfin instance.
Config backups before changes
Before editing an important config file, make a backup copy.
Example:
sudo cp /etc/someapp/config.yml /etc/someapp/config.yml.bak-2026-06-27If the change fails, restore it:
sudo cp /etc/someapp/config.yml.bak-2026-06-27 /etc/someapp/config.yml
sudo systemctl restart someapp
For more complex services, use Git inside the config directory.
Example:
cd /etc/someapp
sudo git init
sudo git add .
sudo git commit -m "Baseline config before changes"
Then you can inspect what changed:
sudo git diffThis is especially useful when a guide tells you to edit several lines and you want a clean way back.
Test risky network changes on one device first
Some homelab changes can upset the whole house.
Examples:
- DNS changes
- Pi-hole or AdGuard Home changes
- router DHCP changes
- reverse proxy changes
- firewall rules
- Tailscale exit node changes
Do not switch the whole network first.
Test on one device:
- Point your laptop or phone at the new DNS server.
- Confirm normal browsing still works.
- Confirm internal services still resolve.
- Confirm streaming and work devices are unaffected.
- Only then change the router-level setting.
This avoids turning a small experiment into a household support incident.
Snapshots are not backups
A snapshot is useful when you make a change and need to roll back quickly.
A backup is useful when the disk dies, the host breaks, or the whole machine is lost.
Use both:
- snapshots before risky changes
- backups for anything you cannot recreate easily
For a practical backup model, see 3-2-1 Backups for Home Servers.
For the full comparison, see Proxmox Snapshots vs Backups: What Beginners Get Wrong.
A simple change checklist
Before a risky change, ask:
- Do I have a snapshot?
- Do I have a config backup?
- Do I know how to roll back?
- Is this a bad time for things to break?
- Can I test this on a clone first?
After the change, check:
- Does it work on my device?
- Does it work on another device?
- Does it still work after a reboot?
- Did any unrelated service break?
If the answer is unclear, pause before making more changes.
Good times to take snapshots
Take snapshots before:
- major package upgrades
- application version upgrades
- storage changes
- network changes
- database migrations
- reverse proxy changes
- authentication changes
Do not keep snapshots forever. They can consume storage and create a false sense of safety.
Keep the useful ones, remove the stale ones.
Next steps
Useful related guides:
- Proxmox One-Node Starter Guide
- Proxmox Snapshots vs Backups: What Beginners Get Wrong
- 3-2-1 Backups for Home Servers
- Jellyfin on Ubuntu: Low-Power Setup and Folder Permissions
- How to Measure Homelab Power Usage Properly
Recap
Experiments are good.
Experiments without a safety net are just outages.
Use snapshots for quick rollback, clones for bigger experiments, and backups for real recovery.
Your homelab should make you want to tinker more, not make you scared to touch it.